Outdoor Porcelain Tile Installation

2thick Stonewave Warm 24x24 Exterior Porcelain Tile Floating Patio Installed With Screwjack Pedestals Outdoor Porcelain Tile Patio Outdoor Decor

Did You Know You Can Reduce The Carbon Footprint Of Your Porcelain Patio Installation Use The Porcelquic Patio Installation Outdoor Patio Diy Diy Patio Pavers

Outdoor Porcelain Tiles Outdoor Tile Patio Patio Tiles Outdoor Gardens Design

Porcelain Deck Tiles Installed On Patio In Seattle Deck Tiles Outdoor Porcelain Tile Building A Deck

Lay Porcelain Tiles Directly On Grass Or Sand Outdoor Tiles Floor Garden Tiles Outdoor Porcelain Tile
Pin On Pool Bar

The tile itself should also be rated for outdoor use and as a general rule porcelain tends to be more durable than ceramic.
Outdoor porcelain tile installation. Porcelain also absorbs less water therefore ceramic is not suited for outdoor use. That means porcelain is a great choice for bathrooms high traffic rooms and exteriors but stone tends to be the best option for exterior tile since they are a natural material. When thinking about using porcelain tiles outdoors there are a number of important considerations to take into account. The material is actually no different to a standard porcelain tile and therefore is treated much the same.
5 mix and apply the tile mortar. Ceramic tile is softer than porcelain which makes it easier to cut for. 10 complete the installation and maintain as needed. Firstly and very importantly porcelain tiles have different grades and you will need to check that your chosen tiles are grade 5 i e.
20 mm porcelain slabs also provide tremendous versatility as they can be laid on virtually any outdoor surface and be fixed with a variety of different methods to suit the application. 4 plan the exterior floor layout and make tile cuts. To help protect your tile from future damage you ll need to include expansion joints into your installation. 8 mix and apply grout.
In this section we provide you with an overview of how ceramic porcelain or stone tile can be used in exterior patios walkways porches. Adhesive free installation techniques allow for dismantling maintenance and repositioning of porcelain slabs. We ve outlined four of the most common installation methods for external porcelain tiles below. When you are ready to begin setting tiles for your new patio that is bonding them to the concrete slab you need to use the appropriate outdoor tile adhesive there are many types to choose from.
9 clean up after grouting. Suitable for outdoor use. Of course it should also have a slip resistant surface. An expansion joint is needed at least every 10 linear feet and an expansion joint at least 1 4 wide is needed around the perimeter of the installation if you re meeting to a solid surface or a wall.
2 prepare the exterior substrate to receive tile. 3 apply a waterproofing membrane. Finally choose a grout that will resist stains and fading so your project will still look good for years to come. 7 prepare the installation for grouting.
1 inspect the exterior substrate. It is important to pick the right one.

Porcelain Tile Portland Tile Portland Flooring Portland Tile Store Portland Flooring Store Portland Patio Pavers Design Outdoor Patio Decor Patio Flooring

Wood Effect Outdoor Styling Ideas Outdoor Tile Patio Outdoor Gardens Design Outdoor Porcelain Tile

Outdoor Tiles In 2020 Outdoor Tiles Outdoor Tiles Floor Patio Tiles

Sandset Porcelain Patio Stones Easy To Install For A Stylish Outdoor Patio And Living Area Patio Stones Patio Travertine Patio

Tiled Front Porch To Match Existing Stained Concrete House Exterior Tile Installation Stained Concrete

Lifeproof Sierra Wood 6 In X 24 In Porcelain Floor And Wall Tile 14 55 Sq Ft Case Lp31624hd1pr The Home Depot Outdoor Patio Decor Outdoor Remodel Patio Flooring

Outdoor Porcelain Tile Pavers Everblue Bluestone Outdoor Tile Patio Outdoor Porcelain Tile Patio Tiles

Biarritz Exterior Slip Resistant Porcelain Tile In 16x32 16x16 And 8x16 Sizes Exterior Tiles Outdoor Porcelain Tile Outdoor Tiles

Installing Tile Outside Patio Tiles Patio Landscaping Patio Installation

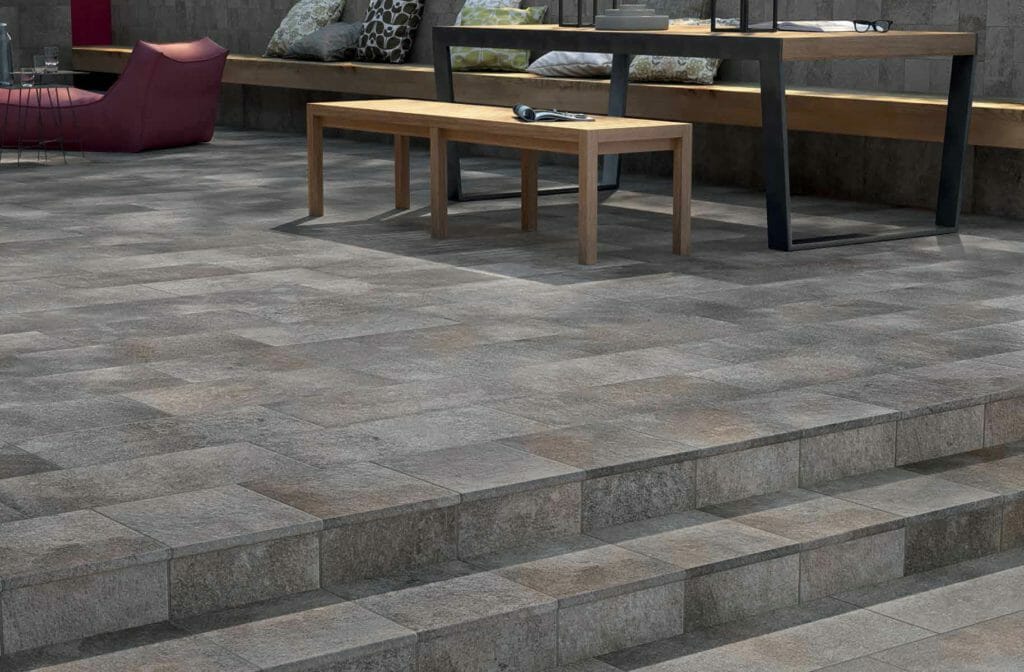
Professionally Installed Porcelain Tile Covers Old Concrete Steps Exterior Tiles Tile Steps Concrete Steps

Make Your Compound Beautiful With Outdoor Tiles Decoration Decorifusta In 2020 Outdoor Tile Patio Patio Tiles Garden Tiles

Sandstone Look Porcelain Tile Installed By John Darke Tiling Tile Installation Outdoor Pool Outdoor Decor

2thick Stonewave Warm 24x24 Exterior Porcelain Tile Porcelain Tile Exterior Installation

Outdoor Patio Flooring Options Flooring Specialist Ceramic Tile Coral Gables Fl Porcelain Tile Patio Tiles Patio Flooring Diy Patio Flooring

Outdoor Porcelain Tile Ideas Outside Patio Flooring Outdoor Patio Slate Tile Flooring Outdoor Porcelain Tile Outdoor Tile Over Concrete Patio Tiles

Wood Effect Outdoor Garden Design Contemporary Rustic Outdoor Tile Patio Patio Flooring Outdoor Porcelain Tile

Pin On Outdoor Area

Strong Porcelain Tile Designed For Raised Access Floor Installation Patio Tiles Outdoor Flooring Outdoor Tiles
3

Sassuolo Prestige Brown 2cm 18x36 Exterior Porcelain Tile Exterior Tiles Tile Installation Outdoor Areas

Wall Tile 01 Porcelanosa Usa Outdoor Porcelain Tile Tile Looks Like Wood Outdoor Wood Tiles

Sienna Anthology Stone Gold Outdoor 12x24 Porcelain Tile Slip Resistant Patio Flooring Outdoor Flooring Outdoor Porcelain Tile

Look What I Found At Floor Decor Outdoor Tiles Floor Screened Porch Designs Patio Tiles

Pin Auf Exterior Porcelain Tiles

White Cararra Marble Look Porcelain Tile For Pool Surrounds Installed By John Darke Tiling Cararra Marble Outdoor Pool Nerang

Milestone S Outdoor Is A New 2 Cm Paving Porcelain System With The Same Benefits As Regular Porcelain That Offers Outdoor Porcelain Tile Outdoor Outdoor Tiles

Silver Birch Wood Outdoor Porcelain Paving Birch Outdoor Paving Porcelain Silver Wood En 2020 Piso De Concreto Estampado Muebles De Bricolaje Concreto Estampado

3 Of The Best Outdoor Porcelain Tiles Outdoor Porcelain Tile Exterior Tiles Stone Tile Flooring

Porcelain Stone Tile On Outdoor Decks Over Living Space White Paper Outdoor Deck Tiles Outdoor Tiles Outdoor Flooring

Luna Copper Outdoor Matt Porcelain Slab Tiles Outdoor Tiles

Pin By Candy Buck Gilbert On Home Renovation Patio Tiles Outdoor Tile Over Concrete Outdoor Tiles

Kilimanjaro Lagos Cement Matt Porcelain Floor Tile 420 X 635mm Tile Floor Outdoor Porcelain Tile Flooring

Porcelain Stone Tiles Outdoor Tiles Polished Porcelain Tiles

Pin On Cement Patio

Surround Pool Tiles Google Search Pool Tile Patio Tiles Outdoor Tiles

Qdi In Az Atlas Concorde Marvel Pro Statuario Porcelain Paver Outdoor Porcelain Tile Patio Outdoor Tiles

Mix Aran Stone Anti Slip Porcelain Tile Floor Decor Outdoor Porcelain Tile Stone Tile Flooring Stone Look Tile

Valverdi Iguazu Grey Indoor 10mm Indoor Outdoor Porcelain Tiles Texture Painting Outdoor Porcelain Tile Stone Texture
Pangea Barge Grigio Ceramiche Refin S P A Exterior Tiles Outdoor Furniture Sets Contemporary Patio

Pin By Stone Trading On Porcelain Tile Outdoor Porcelain Tile Tile Installation Porcelain Tile

New Wood Effect Outdoor Porcelain Tiles Installed In Place Of A Rotten Timber Deck At A House In Abingdon Oxfo Outdoor Porcelain Tile Timber Deck Outside Tiles

Porcelain Tile View All Bedrosians Tile Stone In 2020 Hexagonal Mosaic Wall Tiles Outdoor Tiles

